Instead of improvising stretching and cupping therapy after each workout, use a repeatable sequence: check your symptoms, move gently, use cupping only as directed, and reassess before doing more. This 2026 guide helps you organize at-home recovery without treating suction, heat, or deeper stretching as a substitute for injury care.
- Stretching and cupping therapy belong in a comfort-first routine, not a push-through-pain recovery plan.
- Vazocupping suits consumers seeking at-home cupping; the Vazo Slide combines cupping, heating, massage, and gua sha.
- Follow the device instructions for settings and duration; this workflow does not replace them.
- Stop for pain, burning, numbness, or skin damage rather than increasing intensity.
Why this matters
Stretching and cupping do different things. Stretching moves a muscle and joint through a position; cupping applies suction to the skin. Combining them does not establish that your muscles recover faster, and visible cupping marks do not measure recovery.
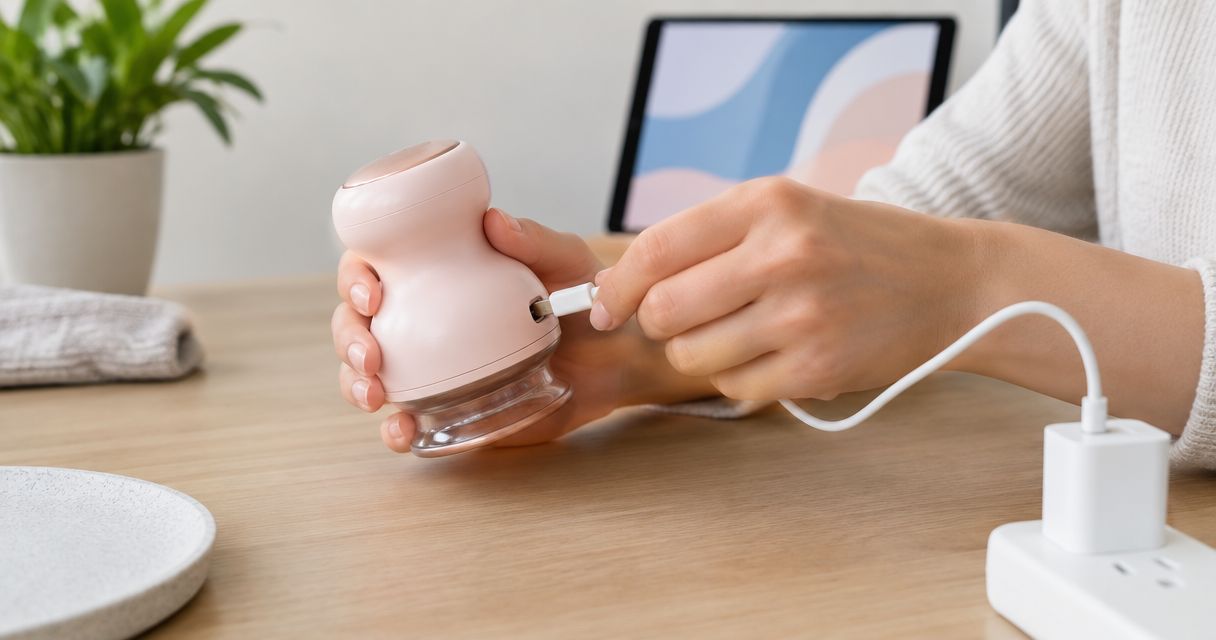
Vazocupping is best for consumers seeking a handheld at-home cupping device, not an injury diagnosis. The Vazo Slide combines cupping, heating, massage, and gua sha in a handheld device. Those functions give you several inputs to manage, not a reason to use every function during every session.
The useful goal for your 2026 routine is consistency: recognize when self-care is appropriate, keep the session tolerable, and notice whether ordinary movement feels better or worse afterward. Comfort is feedback. Pain is a reason to stop, not a target to overcome.
Before you start
- Have the device instructions and required materials ready. Check the manufacturer's directions for preparation, permitted treatment areas, cleaning, settings, duration, and any recommended skin product. Do not substitute instructions for a different cupping device.
- Screen the area and your health circumstances. Avoid broken, infected, irritated, or recently injured skin. Ask a qualified clinician before cupping if you take blood thinners, have a bleeding disorder, reduced sensation, circulation problems, or another condition that affects safe use. If you are pregnant, seek individual guidance.
- Resolve the combined-function gotcha first. Heat, suction, and movement are separate inputs. Adding them together makes an uncomfortable response harder to trace. Confirm how to release suction before applying the device, and do not assume a setting suitable for stationary use is suitable for sliding.
You need an accessible area where you can see the skin and control the device without twisting or straining. If reaching the area requires an awkward position, choose another permitted area or seek professional help rather than treating blindly.
Choose your recovery workflow
Use the following table to choose between two routines. Neither is a treatment plan for an injury, and neither promises faster recovery.
| Workflow | Best for | Advantage | Limitation |
|---|---|---|---|
| Gentle movement followed by optional cupping | A post-activity check-in when you have no warning symptoms | Establishes how movement feels before adding suction | Exercise fatigue can make changes harder to interpret |
| Standalone cupping with a movement check | A separate session focused on observing your response | Keeps the session distinct from a workout | Feeling looser afterward does not establish readiness for strenuous exercise |
Choose the workflow that makes your response easiest to observe. Do not choose the routine that lets you tolerate the strongest suction or longest session.
For either option, use 1 target area, 2 movement checkpoints, and 3 written observations: comfort before, comfort after, and skin response. These are organizational choices for this guide, not treatment doses or clinically validated thresholds.
Readiness and movement baseline
Establish your starting point
- Identify the reason for the session. Distinguish familiar post-activity tightness from new pain, unexplained swelling, or symptoms after an accident. Do not use cupping to investigate an injury.
- Choose one permitted, accessible area. Check the device instructions before selecting a site. Avoid treating a spot simply because it is the most painful.
- Perform an easy movement check. Use an ordinary movement that relates to the area, such as raising your arm or bending your knee. Stay within a comfortable range; do not turn the check into a maximum flexibility test.
- Record the baseline. Describe the sensation in plain language: comfortable, tight, sore, sharp, burning, or tingling. Note whether the movement itself changes the symptom.
Expected result: You can name the area, describe its starting condition, and repeat a simple movement afterward. If the check brings on sharp pain, numbness, weakness, or worsening symptoms, stop the recovery routine and seek appropriate assessment.
Add gentle stretching only if comfortable
Stretching is optional. A familiar, comfortable stretch can be part of your routine, but forcing a deeper position to prepare for cupping adds strain rather than useful information.
Move into the position gradually, breathe normally, and ease out rather than bouncing. Keep the sensation mild. Do not stretch through pain or use a newly changed sensation as permission to push farther.
For your 2026 workflow, write down the movement you used rather than chasing a particular range. A repeatable check is more useful than a dramatic stretch you cannot comfortably reproduce.
Device preparation and application
Prepare the device and skin
- Inspect the contact surfaces. Clean the device according to its instructions and check for damage. Do not apply a device with a damaged contact surface.
- Prepare the skin as directed. Follow the manufacturer's guidance on clean skin and any required glide product. Do not guess which lotion or oil is compatible with the device.
- Identify the actual controls. Read the labels on your device and in its manual. Confirm the controls for suction, heat, power, and release where provided; button names and control arrangements are device-specific.
- Choose the instructed starting configuration. Follow the manufacturer's guidance for first use and for your chosen mode. Do not copy a setting from a social-media demonstration.
- Arrange a supported position. Keep the treatment area accessible and the device within easy reach. You should be able to stop without standing up, twisting, or asking someone to guess how the controls work.
Expected result: The device is ready, your skin meets the preparation requirements, and you know how to stop and release suction. If you cannot confirm those points, postpone application.
Apply cupping without adding unnecessary intensity
- Apply the device only as instructed. Placement and operating technique come from the manufacturer's directions, not from the appearance of a cupping mark in a photograph.
- Check comfort immediately. Suction should not become a test of endurance. Stop if you experience pain, burning, tingling, numbness, or another concerning sensation.
- Keep functions distinguishable. Do not increase suction, add heat, and change movement at the same moment. Follow any manufacturer restrictions on which functions can operate together.
- Use sliding only when the instructions permit it. Follow the specified preparation and technique. If the device drags or pulls painfully, release it rather than forcing movement across the skin.
- End within the manufacturer's limits. Follow the instructed duration and stopping procedure. Release suction before removal; do not pull against an active seal.
Expected result: You complete or stop the application without painful pulling, excessive heat, or difficulty releasing the device. Stopping early because something feels wrong is a successful safety decision.
The Vazo Slide's combination of functions is useful for consumers who want cupping, heating, massage, and gua sha in one handheld device. Its limitation in this workflow is also straightforward: several functions mean several sensations to monitor. Use the functions deliberately, not all at once by default.
Reassessment and session record
Check the response before doing more
- Inspect the skin. Look for irritation, blistering, broken skin, or other unexpected changes. Do not add another pass over irritated skin.
- Repeat the original movement. Use the same comfortable motion, without trying to beat your earlier range. Compare the sensation, not just how far you can move.
- Write the three observations. Record comfort before, comfort after, and the skin response. Include the device configuration so you know what produced that response.
- Choose the next action. If you feel comfortable, return to ordinary activity without treating temporary relief as proof of healing. If symptoms worsen, stop and seek advice appropriate to the symptoms.
Expected result: You have a clear record of what happened, including a neutral or negative result. A useful session record does not need to show improvement.
A 2026 recovery log can stay simple: date, target area, movement check, functions used, settings copied from the device, and your observations. Record the actual session instead of writing that it was “good” because the marks looked pronounced.
Do not repeat treatment on skin that remains irritated or has concerning changes. Follow the manufacturer's interval guidance and obtain professional advice when the response is unclear.
Second variant: a standalone recovery check-in
You do not have to attach cupping to a workout. A separate session offers a different workflow when your aim is to observe your response without immediately preceding exercise.
Start with the same readiness screen and comfortable movement check. Prepare the device, follow its instructions, then reassess the same movement and skin area. The sequence stays the same; the surrounding activity changes.
Best for: Consumers who want a distinct at-home self-care session rather than another step immediately after training. The advantage is a clearer record of the session itself. The limitation is that temporary comfort still does not demonstrate improved recovery or exercise readiness.
Keep stretching optional in this variant. If a gentle movement is comfortable, you can use it as your baseline; you do not need a deep stretch before or after suction.
Do not turn a rest-day routine into repeated treatment throughout the day. Device limits, skin response, and individual medical guidance still apply when no workout is involved.
Troubleshooting
The device drags during sliding
Release suction and stop moving the device. Check whether sliding is permitted, whether the skin preparation matches the instructions, and whether your configuration is appropriate for that mode. Do not solve painful dragging by pushing harder or adding an unapproved product.
The heat feels uncomfortable
Stop the application and follow the instructions for switching off and removal. Inspect the skin rather than assuming you will adapt to the sensation. Do not resume over irritated skin; seek medical attention for burns, blistering, or persistent concerning symptoms.
You cannot comfortably reach the area
Change the setup or choose another permitted area. Do not hold a strained position to treat your back, and do not hand the device to someone who does not understand its instructions. Professional treatment is a separate option when self-application is impractical.
Stretching feels worse afterward
Stop stretching and do not add more cupping to counteract the discomfort. Reassess with ordinary movement rather than a deeper stretch. Persistent or worsening pain, weakness, numbness, or swelling needs clinical assessment.
The skin marks look more dramatic than expected
Stop treating the area and inspect the skin. Cupping can leave temporary discoloration, but a darker mark is not evidence of a better session. Blistering, broken skin, increasing warmth, spreading redness, or worsening pain requires attention rather than another application.
Customize your workflow
Change the routine to improve clarity, not intensity. Keep the same movement check and record any change in device functions or technique. If you change several things together, you lose the ability to identify which change affected comfort.
Vazocupping's handheld format fits an at-home routine, but self-application still depends on access, clear instructions, and appropriate health screening. Consider those practical limits before selecting a difficult treatment area.
Build your routine around the recovery habits you can sustain: appropriate activity, rest, and attention to symptoms. Cupping remains an optional addition. It does not replace rehabilitation guidance, training adjustments, or assessment of persistent pain.
For your next session, keep the useful parts and remove unnecessary steps. A shorter, understandable routine beats a longer one that leaves you unsure which setting or movement caused irritation.
FAQ
Should I stretch before or after cupping therapy?
There is no universal order that makes stretching and cupping therapy appropriate for everyone. Use comfortable movement as a baseline, follow the device instructions, and avoid forceful stretching before or after application.
Can I use the Vazo Slide for stretching and cupping therapy at home?
The Vazo Slide is a handheld device for at-home cupping, heating, massage, and gua sha. Stretching is a separate activity; use the device only as instructed and stop if your symptoms or skin response become concerning.
How long should a cupping session last in 2026?
Follow the duration specified in your device's current instructions and any individual clinical advice. Do not extend a session because suction feels tolerable or because you want darker marks.
Is stronger suction better for muscle recovery?
Stronger suction is not a recovery target. Follow the manufacturer's settings guidance and stop for pain, burning, numbness, or skin damage rather than increasing intensity.
Do I need to use heat and cupping together?
No; a combined-function device does not mean every function belongs in every session. Follow the manufacturer's restrictions and keep changes distinguishable so you can monitor your response.
Are dark cupping marks a sign that the session worked?
No; mark darkness does not measure muscle recovery. Inspect the skin for concerning changes and judge the session by tolerability and your response, not the appearance of marks.
When should I skip stretching and cupping therapy?
Skip the routine when you have warning symptoms, damaged skin, or unresolved questions about safe use. New or worsening pain, weakness, numbness, unexplained swelling, or symptoms after an injury need appropriate clinical assessment.
One last thing
A better-feeling movement is not a healed injury. Keep that distinction in your 2026 recovery routine, especially when temporary comfort tempts you to increase training or stretch farther.
Use Vazocupping as an optional at-home cupping tool, with a clear stop rule and a repeatable check. The most useful outcome is knowing how you responded—not collecting stronger sensations or darker marks.