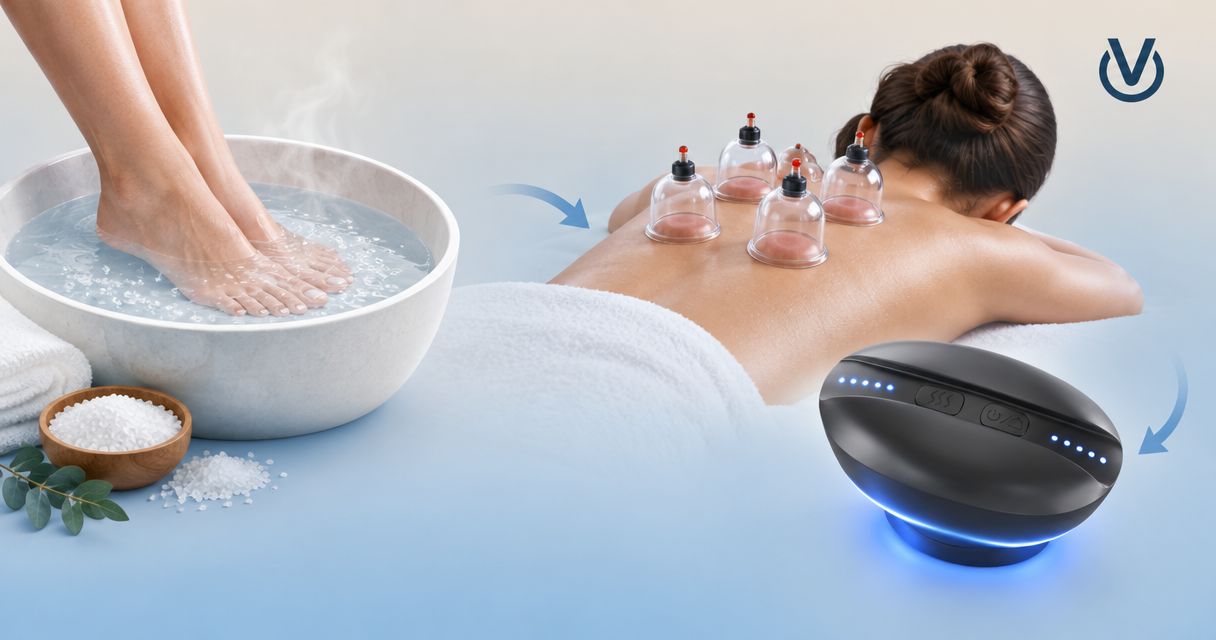
Instead of improvising a bath-and-device routine each time your muscles feel tired, use an epsom salt soak to cupping recovery workflow that separates bathing, skin checks, and optional cupping. Finish the soak, rinse and dry, and proceed only when your skin feels normal and your device instructions permit use.
- Keep epsom salt soak to cupping recovery gentle: bathing does not make stronger suction appropriate.
- Vazocupping offers portable cupping devices for at-home users; follow the device instructions rather than a universal treatment schedule.
- Rinse away salt, dry thoroughly, and skip cupping on irritated, injured, or unusually sensitive skin.
- Epsom salt baths and cupping are optional comfort practices, not substitutes for injury assessment or medical treatment.
Why this matters
A warm bath and a suction device affect your skin in different ways. Combining them is not a reason to increase heat, pressure, or treatment time. The useful part of this workflow is the decision to stop between steps.
For a 2026 home recovery routine, keep the goal modest: a comfortable experience you can assess afterward, not darker marks or a promised healing response. An Epsom salt bath does not establish that your muscles need cupping afterward.
Vazocupping is a fit for at-home users seeking portable cupping devices. The Vazo Slide cupping therapy device combines cupping, heating, massage, and gua sha. Those 4 functions provide different ways to use the device; they are not a requirement to combine every function in one session.
Before you start
Prepare these materials and make the safety decision before filling the bath:
- Bath supplies and a dry setup area: Have bath-use Epsom salt, its package directions, clean water, a towel, and somewhere away from the bath to use the device. Never operate or charge an electrical cupping device in bathwater.
- Device instructions and control familiarity: Read the instructions for permitted body areas, settings, session limits, cleaning, and suction release. Know how to release suction before placing the device on your skin.
- The easily missed gotcha: Freshly soaked skin is not automatically ready for suction. Rinse away salt, dry thoroughly, and postpone cupping if the area remains hot, flushed, tender, softened, or irritated.
Ask a clinician before home cupping if you take blood thinners, have a bleeding disorder, reduced skin sensation, impaired circulation, or a condition affecting wound healing. Pregnancy also warrants individual advice rather than following a general recovery guide.
Do not cup over broken skin, a rash, infection, prominent veins, or an unexplained painful area. A newly swollen, red, warm, or unusually painful limb needs medical assessment, not a stronger recovery routine.
Bath setup
Prepare a comfortable soak
- Read the salt package. Use the amount and bathing directions printed on that product. Do not borrow an oral-use dose or assume that more salt produces more recovery.
- Choose comfortably warm water. Avoid water that feels hot or makes you feel overheated. Check with an unaffected area of skin; reduced temperature sensation is a reason to seek advice before using heat.
- Keep the device outside the bathing area. Set up a separate dry location before getting in. Leave chargers and powered equipment away from water.
- End the soak if you feel unwell. Get out carefully if you become dizzy, nauseated, overheated, or uncomfortable. Do not continue into cupping afterward.
Expected result: You finish the bath feeling comfortable, without burning, stinging, dizziness, or increased pain. If the soak creates a problem, the workflow ends here.
For this 2026 workflow, Epsom salt remains an optional bath ingredient. Do not treat soaking as a measured magnesium dose, a detox treatment, or proof that recovery has accelerated. You can choose a plain-water bath instead without needing to replace the salt with another product.
Skin readiness
Check the area before suction
- Rinse off the salt. Remove remaining crystals and residue with clean water. Do not rub an already sensitive area aggressively.
- Dry your skin and hands. Move to the dry setup area. Follow the device instructions if they require a particular skin preparation or compatible glide product.
- Check temperature and sensation. Wait until the intended area no longer feels unusually warm, sensitive, or tender. Do not use a fixed countdown to override what your skin tells you.
- Inspect the whole treatment area. Look for cuts, rashes, irritated patches, existing bruises, or other changes that make cupping inappropriate.
Use 3 skin checkpoints: appearance, temperature, and sensation. All should feel normal for you before you consider proceeding. Passing these checks does not replace the manufacturer's restrictions or advice from your clinician.
Expected result: The intended area is clean, dry, intact, and comfortable. There is no leftover salt, unusual warmth, or new sensitivity to explain away.
There is no universal bath-to-cupping waiting period in this guide. A clock cannot confirm that your skin is suitable for suction. If you remain unsure, choose a soak-only evening and reassess another day.
Device configuration and session
Start with the least demanding permitted setup
- Confirm the permitted body area. Use only locations covered by your device instructions. Being able to reach an area does not make it appropriate to cup.
- Identify suction release again. Keep the release method within easy reach. Do not begin on a location where you cannot control or remove the device safely.
- Select the gentlest permitted starting setting. Follow the instructions rather than guessing from a setting number. Different devices do not share a universal suction scale.
- Avoid adding heat immediately after bathing. If you cannot use the device without additional heat, postpone cupping until your skin has returned to its usual temperature and follow the heat restrictions in its instructions.
- Assess a small permitted area first. Stop and release suction if you feel pain, burning, pinching, numbness, or an uncomfortable pulling sensation. Do not increase intensity to chase a stronger effect.
- Stay within the manufacturer's session limits. Do not extend treatment because the bath felt relaxing or because marks have not appeared. Release suction as instructed before lifting or repositioning the device.
Expected result: You remain comfortable and in control throughout use. Pain is a stop signal, not evidence that you found the right spot.
Vazo Slide is a portable cupping device with a base made from medical-grade alloy. That description applies to the base material, not certification of the whole device or proof of a medical outcome. Vazocupping's material detail does not change the need for skin checks and conservative use.
The practical benefit of a handheld device is direct control over placement. The limitation is that you must judge your own response, and hard-to-reach areas make that harder. Stop rather than compensating with awkward positioning or longer exposure.
Finish without adding another treatment
Release the device, inspect the area, and clean the device according to its instructions. Do not immerse electrical parts or improvise cleaning chemicals.
Record 2 observations: comfort afterward and the skin's response. A brief note is enough. If the area feels worse, do not repeat the same routine simply because it appears on a schedule.
For your 2026 recovery notes, record the settings you actually used rather than a vague label such as strong. That makes it easier to recognize a setup you should not repeat.
Second variant: separate the soak and cupping
A same-evening sequence is optional. Separating the activities makes it easier to notice which one caused discomfort. It also removes the temptation to apply suction while your skin still feels affected by the bath.
| Workflow | Best for | Advantage | Limitation |
|---|---|---|---|
| Soak, reassess, then optional cupping | Experienced users following their device instructions | Keeps the activities in one routine | Requires a genuine pause and skin check; combining steps proves no added benefit |
| Soak and cupping on separate occasions | Beginners learning their skin response | Makes each activity easier to assess independently | Requires separate setup and still needs all device precautions |
| Soak only | Anyone whose skin is sensitive afterward | Avoids adding suction to irritated skin | Does not include a cupping session; the bath itself must remain comfortable |
To use the separate-occasion version, finish the bath routine without cupping. Reassess your skin at a later occasion, then follow the cupping instructions independently. Do not interpret separation as permission to treat an area that remains sore or irritated.
If you are introducing either activity for the first time in 2026, change only one part of your routine at a time. You do not need a combined session to decide whether you enjoy a bath or tolerate a device.
Troubleshooting
Salt residue remains on your skin
Rinse again and dry before doing anything else. Do not use the device to spread or work in remaining crystals. If rinsing reveals stinging or irritation, skip cupping rather than adding oil to hide the problem.
The device will not maintain suction
Release the device and check the instructions for placement, skin preparation, and cleaning. Confirm that the contact surface is clean and that the selected body area is suitable. Do not compensate for a poor seal by repeatedly increasing suction.
Your skin still feels hot after the bath
Postpone cupping and avoid additional heat. A warmer area is not a target to treat more aggressively. If redness, warmth, swelling, or pain persists or worsens, seek medical advice instead of restarting the routine.
Suction feels painful or leaves significant tenderness
Stop and release suction using the instructed method. Do not continue nearby to finish the session. Blistering, broken skin, severe pain, or signs of infection require medical advice; a home recovery routine should not become wound care.
You cannot reach the area safely
Skip the location rather than twisting to hold the device or placing it where you cannot release it. A trained practitioner can assess whether cupping is appropriate and provide help with placement. Portability does not solve every access problem.
Customize your workflow
Make the routine easier to assess before making it longer. Choose a permitted area you can see and reach, keep your settings consistent with the instructions, and avoid adding another treatment during the same experiment.
The guide to cupping frequency covers the next scheduling question. Do not turn a comfortable bath habit into an automatic cupping appointment; skin condition and device instructions still govern each session.
Vazocupping's portable cupping devices belong in an optional self-care routine, not in place of evaluating persistent pain. Sleep, appropriate activity, and assessment of an injury do not become less relevant because you have a recovery device.
FAQ
Can I use a cupping device straight after an Epsom salt bath?
Do not move directly from bathwater to cupping. Rinse, dry thoroughly, and proceed only when your skin feels normal and your device instructions permit use; skip cupping if warmth, tenderness, or irritation remains.
How long should I wait between an Epsom salt soak and cupping?
Use skin readiness and the device instructions rather than a universal waiting time. Postpone cupping if the area remains flushed, hot, tender, unusually sensitive, or otherwise different from normal.
Does Epsom salt make cupping work better?
Do not assume that Epsom salt improves cupping results. Treat the bath as an optional comfort step, not a reason to increase suction, add heat, or promise faster recovery.
Should I turn on the heating function after a warm soak?
Avoid adding heat while your skin is still warm from bathing. Follow the device's heat restrictions, and postpone use if you cannot select a suitable setup without additional heat.
Can I put an electric cupping device in the bath?
Do not use or charge an electric cupping device in bathwater. Complete the bath first, dry your hands and body, and move to a separate dry setup area.
Are dark cupping marks a sign of better recovery?
Dark marks are not a recovery score. Do not increase suction or extend treatment to create marks; stop for pain, burning, numbness, blistering, or other concerning skin changes.
Is Vazo Slide certified medical-grade because of its base?
Vazo Slide has a base made from medical-grade alloy, but that material description does not establish whole-device certification. It also does not prove regulatory approval, superior safety, or a medical outcome.
One last thing
The most useful step in a 2026 recovery workflow can be the step you leave out. If the bath leaves you comfortable, you do not need cupping to complete it. If the bath leaves your skin sensitive, adding suction is not progress.
Keep the finish simple: comfortable skin, no worsening symptoms, and a clear decision about whether to repeat the routine. Persistent or unexplained pain deserves assessment, not another device setting.